Tutorial 4 - Setting up relationships
It is usual to want to link one set of objects with another list of objects. For example, People with Houses or Cars with Drivers. As is usual in these relationships there are different classes: One to One, One to Many and Many to Many. In this tutorial we will take a very simple example of creating two lists and creating a relationship between the two.
1. Follow the guide 'Tutorial 1 - Making and Displaying Lists' and create two lists that you would like to associate.
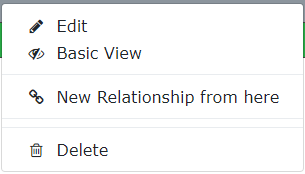
2. Once you have your two lists created, right click on the parent list you would like to associate another list to. From the drop-down list select 'New Relationship from here'.
Once selected, all possible object to create an association with from the original object you right clicked on will be shown with a orange arrow icon next to it. See example below.
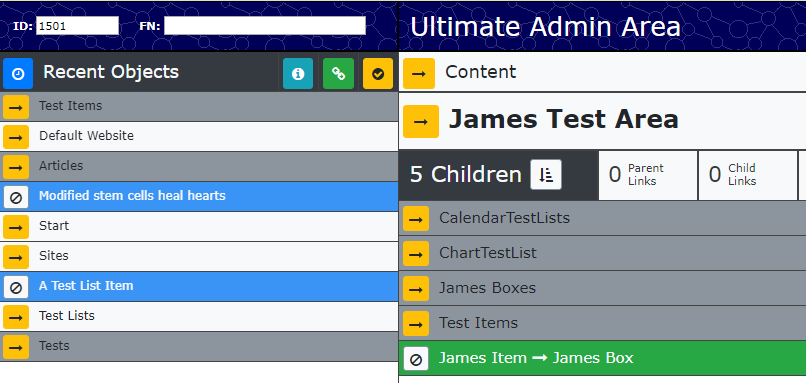
You should then click on the child object you wish to create the association with. (I'm going to choose the ChartTestList) Once selected you'll see a new 'Relationship' object, in green. Right click edit this item, and select 'Parent - Child : Relationship Options', for this exercise we will tick the One to one relationship option and scroll down and click 'Save'. Now select 'Parent - Child: Edit Options' tab, and select 'Relationship Entry Method' of 'Dropdown List'. Scroll down and save.
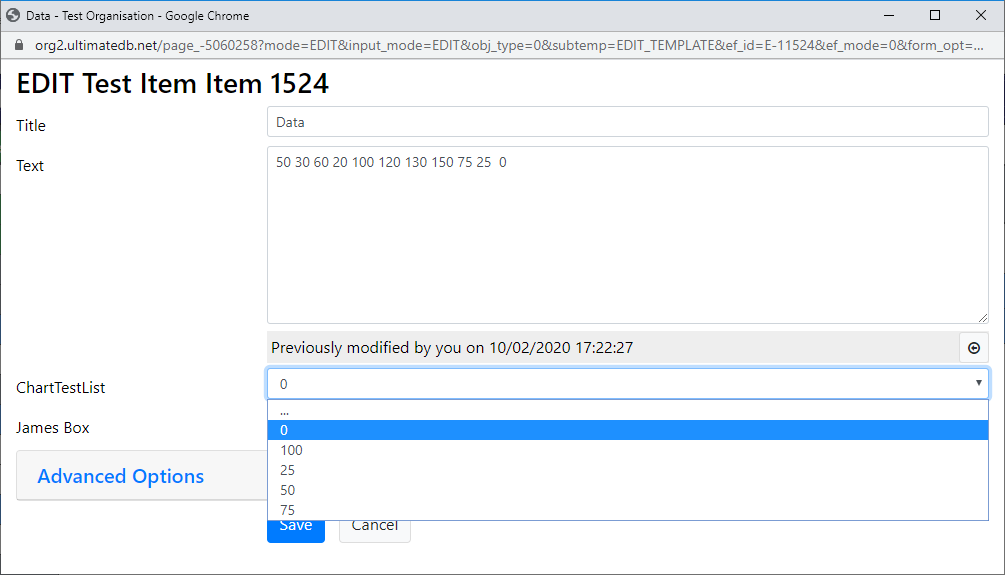
If you now right click and edit items in your test items list, you should see an additional field (Named after the other list) where you can associate items in that list with the one you are editing. See example below.
It's a basic building block of Ultimate Database, list linked to lists.This was a simple one-to-one relationship but you can create one to many and many to many as required by your application.