Importing Data
Reference material that we recommend you read before continuing.
Additional Reading Material
In this tutorial we will be explaining how data can be imported into Ultimate Database.
We will start off using a simple example of what it means to import data.
A relatively simple example using the Ultimate Database Admin Area
Lets say that you have just been asked to import some new users onto the system. It could be 5, it could be 50, or even 500 and you could clearly add them manually using the organisation screen on your application. But no one wants to do that plus it will be a lot quicker to import the list directly into your application.
So what do we need to import for a new user? Well really it would be just the email address however since this is a tutorial lets also assume that we have their names as well.
The list of data to import
So this could be the simple list or spreadsheet that we have been provided.
| Email Address | Name |
| andy.peters@udb-kidstv.com | Andy Peters |
| basil.brush@udb-kidstv.com | Basil The Fox Brush |
| cat.deeley@udb-kidstv.com | Cat Deeley |
| phillip.schofield@udb-kidstv.com | Phillip Schofield |
| edd.duck@udb-kidstv.com | Edd The Duck |
The objects that we will import into the Ultimate Database Admin Area
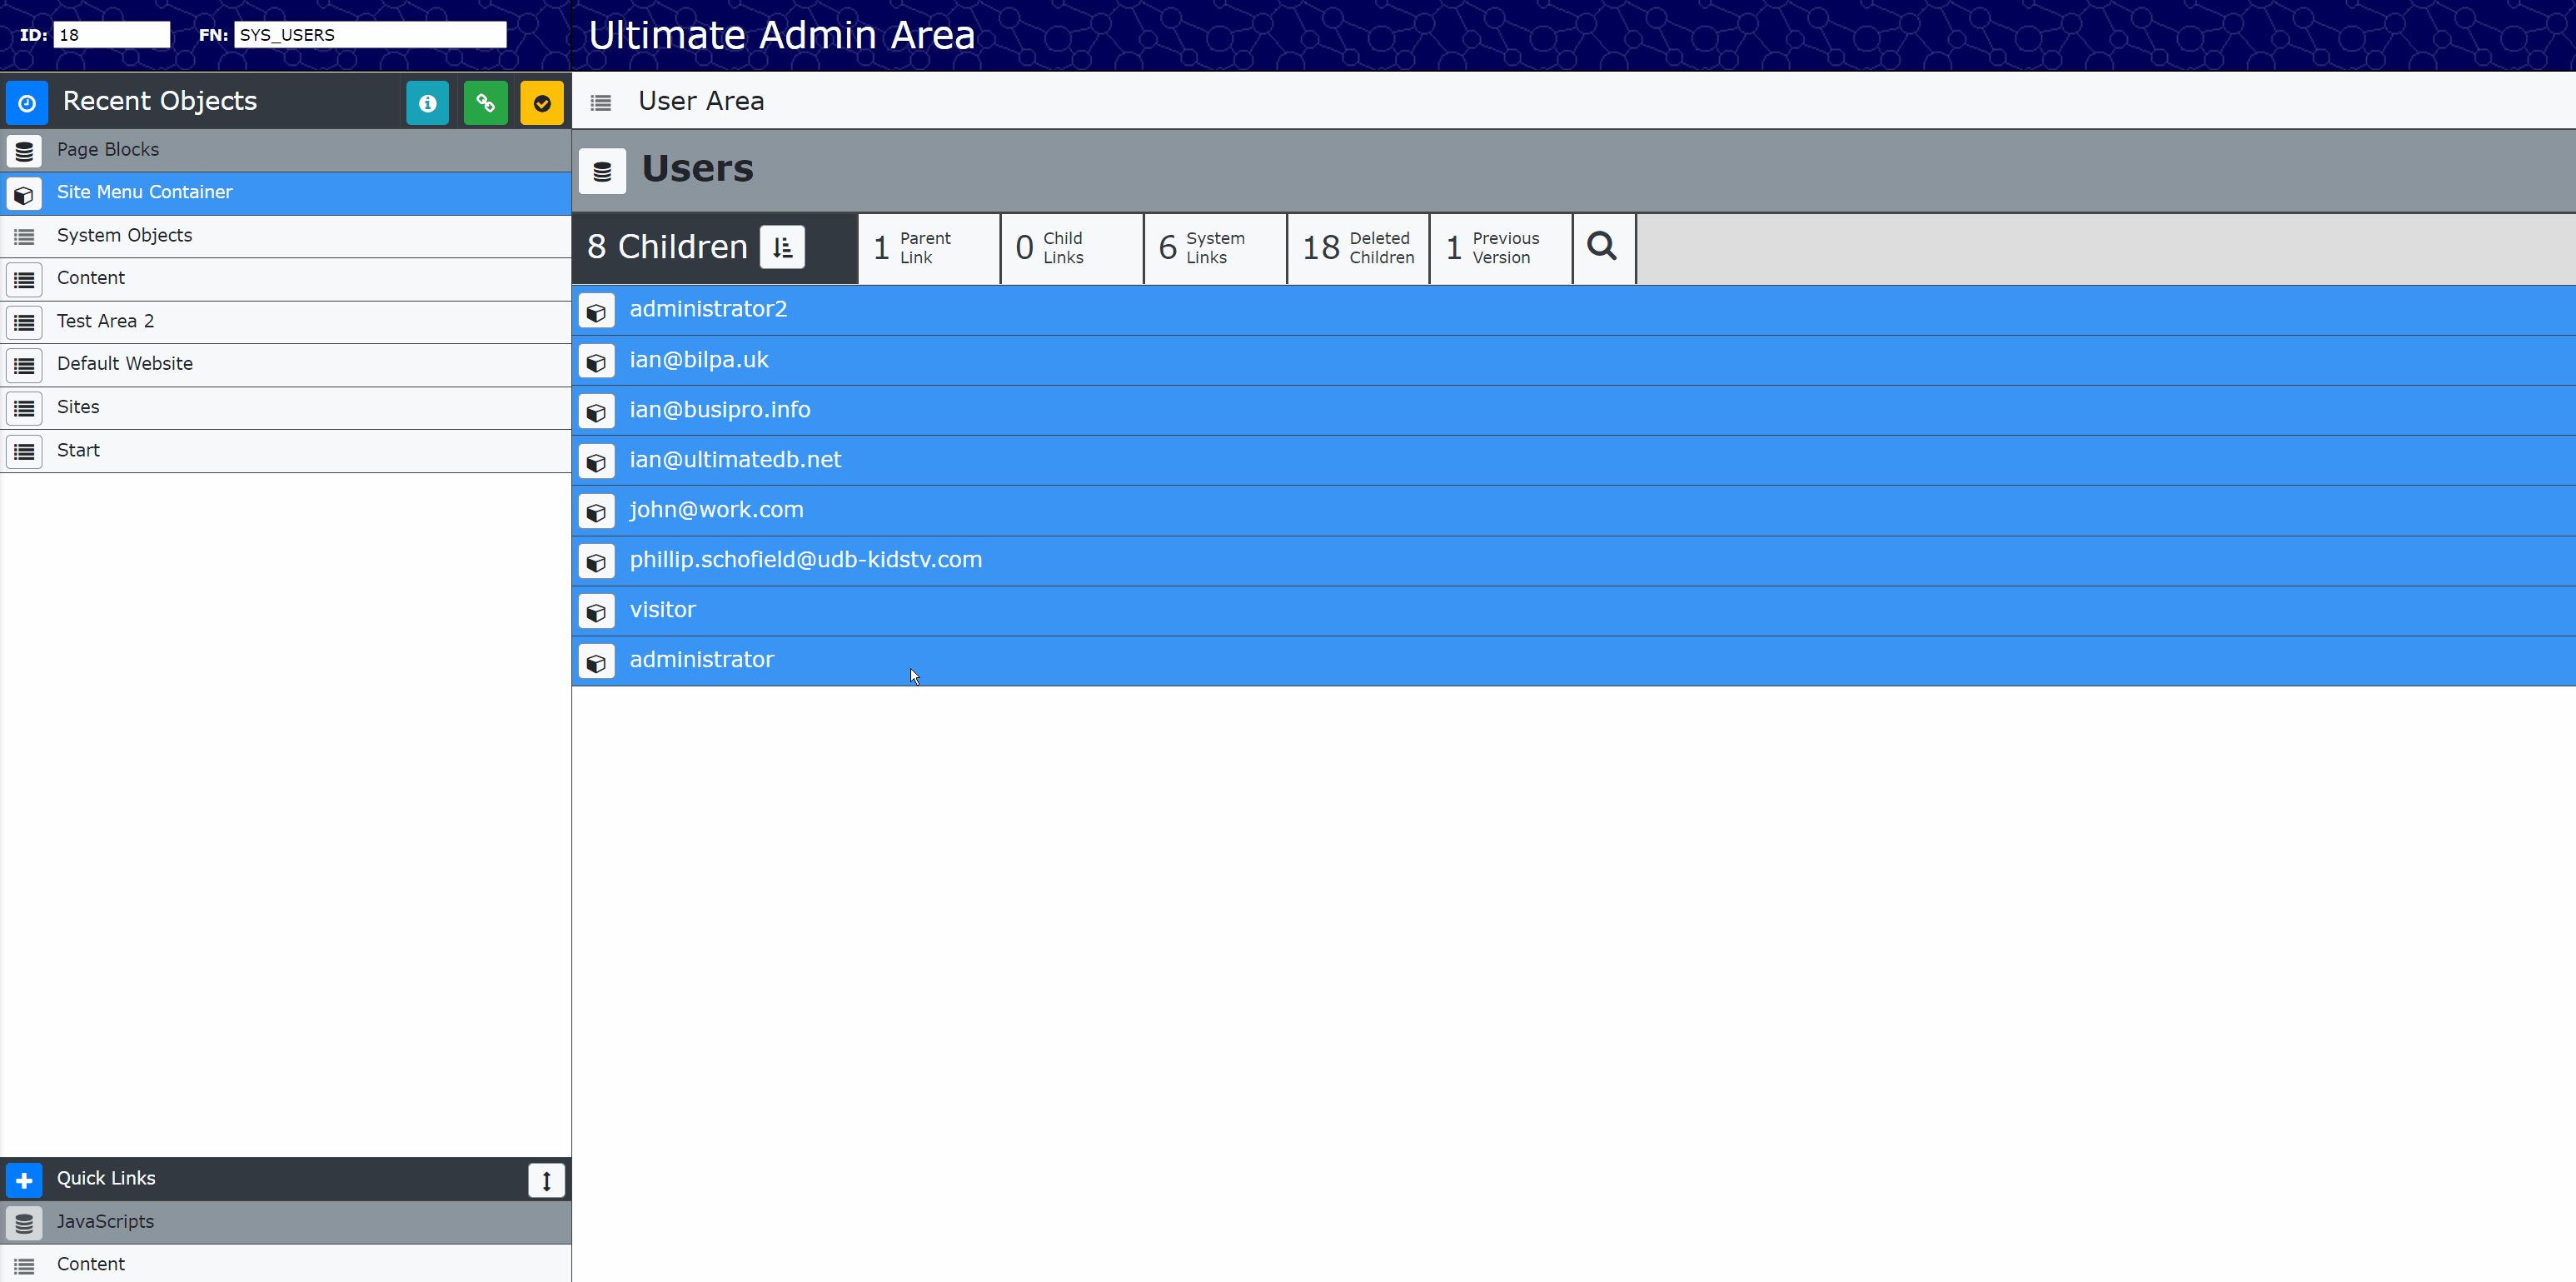
On the Ultimate Database Admin Area users are normally kept under Object 18 (Users) and the information required is as follows:-
Username, Email Address, Title, First Name, Last Name, Mobile, Preferred Language, Log Level & Password. There are other sections but we will just use these to start with.
A few things to consider
Looking at the data we need to import and where we are importing it into we already have a few things that may cause some problems. Lets go through them one by one:-
Username - There is no username on the list to import so we will have to specify one, since we use the email address as the username on this application we can simply use the email address for the username.
Email Address - We will use the Email Address supplied.
Title - We have not been supplied with a Title and as this not a required field this is not going to create any issue.
First Name - This will need to be taken from the Name field in the list provided.
Last Name - Will also need to be taken from the Name field.
Mobile - not provided and not a required field so we can ignore this.
Preferred Language - again not an essential requirement to be populated.
Log Level - this is the level of the user that we are importing, I asked the person who provided us the list and they are all standard users. We will need to remember this!
Password - if there was a password provided, then it would be hashed for security as it is imported. Since no password if provided we would need to ask all the users to request a password reset or somehow manage this in a more programmatic way. For the sake of this example, and keeping it simple we will assume we will ask the users to reset their passwords before logging on.
Manipulating the data
Now before we start copying and pasting columns and working out formulas on your spreadsheet to split cells lets use the tools that are built into Ultimate Database. Using very simple headers like the ones below we can import data into the objects on Ultimate Database, now before you think this is not going to do the job that we are discussing you are right its not, this is purely an example of how the headers looks. So just to clarify we will use these headers as the column headers in our list/spreadsheet so that we can import the columns into an object on Ultimate Database.
[0:C1] [0:C2] [0:TX:forename] [0:TX:surname]
So lets break this down. The 0 after the first left square bracket [ represents the current object the colon : is used as a divider and the code represents the part of the object that we will be importing into on the Ultimate Database. So 1 represents part one of the object which in this case is the username and 2 imports to part two of the object which is the email address. Looking at the third part of the header above we can see a 3 which represents XML, so part three of the header will be imported into the XML field labelled forename and part four of the header will be imported into the xml field labelled surname.
Returning to our data
So looking again at our email addresses and names that we have already established will be imported into object 18 (Users) on Ultimate Database we need to add the headers to our list. So we first need to make a copy of column one as the username and email address will be the same. We can then add the headers as explained above to the columns, [0:1] for the username and [0:2] for the email address.
[0:C1] |
[0:C2] |
Name |
| andy.peters@udb-kidstv.com | andy.peters@udb-kidstv.com | Andy Peters |
| basil.brush@udb-kidstv.com | basil.brush@udb-kidstv.com | Basil The Fox Brush |
| cat.deeley@udb-kidstv.com | cat.deeley@udb-kidstv.com | Cat Deeley |
| phillip.schofield@udb-kidstv.com | phillip.schofield@udb-kidstv.com | Phillip Schofield |
| edd.duck@udb-kidstv.com | edd.duck@udb-kidstv.com | Edd The Duck |
Complicated formula time!
The next thing we need to do is split column three into first name and last name so that we can import it into the XML fields names forename and surname. Depending on your level of experience with your list or spreadsheet program you may be able to do this easily, however Ultimate Database does have a few tools to help with this. A full breakdown of the tools that we call operations can be found here Import Definitions. To help us with our import we will be using the following operations fn and ln. Lets explain what these do in detail by using the second row from our data above that is for Basil The Fox Brush.
fn- will analyse the data being imported and strip all but the first word so will import Basil.ln- will analyse the data being imported and strip all but the last word so will import Brush
The middle name of The Fox will be ignored and not imported in this example however there is an mn operation that we could use that would strip the first and last words from the field and import whatever is left.
Final compiled data to import
So lets add this to our data and see how its all going to look before we actually import it. Now since we are importing the first and last name by using the operations of fn and ln we need to duplicate the columns first. So this is how our final data will look.
[0:C1] |
[0:C2] |
[0:TX:forename:fn] |
[0:TX:surname:ln] |
| andy.peters@udb-kidstv.com | andy.peters@udb-kidstv.com | Andy Peters | Andy Peters |
| basil.brush@udb-kidstv.com | basil.brush@udb-kidstv.com | Basil The Fox Brush | Basil The Fox Brush |
| cat.deeley@udb-kidstv.com | cat.deeley@udb-kidstv.com | Cat Deeley | Cat Deeley |
| phillip.schofield@udb-kidstv.com | phillip.schofield@udb-kidstv.com | Phillip Schofield | Phillip Schofield |
| edd.duck@udb-kidstv.com | edd.duck@udb-kidstv.com | Edd The Duck | Edd The Duck |
Once you have imported the data you will see that the first name and last name fields have been strippe ad the data was imported successfully. We did all this with a little bit of copying and pasting and by using Ultimate Database import data operations.
[0:C1] |
[0:C2] |
[0:TX:forename:fn] |
[0:TX:surname:ln] |
| andy.peters@udb-kidstv.com | andy.peters@udb-kidstv.com | Andy | Peters |
| basil.brush@udb-kidstv.com | basil.brush@udb-kidstv.com | Basil | Brush |
| cat.deeley@udb-kidstv.com | cat.deeley@udb-kidstv.com | Cat | Deeley |
| phillip.schofield@udb-kidstv.com | phillip.schofield@udb-kidstv.com | Phillip | Schofield |
| edd.duck@udb-kidstv.com | edd.duck@udb-kidstv.com | Edd | Duck |
That's not quite it just yet
The final part of this import process ,and it could be said the most important, is after you have imported your data into your Ultimate Database Admin Area it will give you a list of the object id that have been imported by row. It will only give you these records once so we strongly suggest that you copy them and paste them next to the data you imported and save this somewhere save. You never know, maybe you did something wrong or the powers that be want you to retract this from the system. If you have a record of what was imported and to where it will make your life a far lot easier. Once you have pasted them next to your data it's worth reviewing them to see if there were any oddities. So lets see what was returned for the data we imported.
[0:C1] |
[0:C2] |
[0:TX:forename:fn] |
[0:TX:surname:ln] |
|
| andy.peters@udb-kidstv.com | andy.peters@udb-kidstv.com | Andy | Peters | #:1222 |
| basil.brush@udb-kidstv.com | basil.brush@udb-kidstv.com | Basil | Brush | #:1223 |
| cat.deeley@udb-kidstv.com | cat.deeley@udb-kidstv.com | Cat | Deeley | #:1224 |
| phillip.schofield@udb-kidstv.com | phillip.schofield@udb-kidstv.com | Phillip | Schofield | #:0 |
| edd.duck@udb-kidstv.com | edd.duck@udb-kidstv.com | Edd | Duck | #:1225 |
The final check
So as we can see that the row containing Phillip Schofield has returned an object id of #:0 which means it was not imported for some reason. After investigating this we identified that since the Ultimate Database objects of username and email address are set to be unique on the system and as a Phillip Schofield is already on the system we cannot add them again. So in this case not adding Phillip Schofield twice is the correct thing to do.
Where do we import the data then?
To import the data into Ultimate Database we need to navigate to the object that we will import into, which in this example is object 18 (Users), and then right click on the title bar. Select 'Import Items' from the list and then select your data from the list or spreadsheet and copy it into the box that has popped up on the Ultimate Database Admin Area. Overwrite the default header fields that are there already there and click submit. At this point you need to be patient as depending on the number of records this may take a while but once it has completed you will be presented with the object id's. Take a look at this to see it in action.